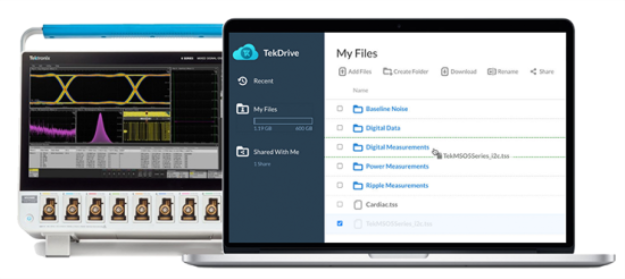

Getting data off your oscilloscope and into the hands of a colleague or a processing program can be a hassle — and that is exactly the problem that TekDrive solves. TekDrive allows effortless collaboration by transferring, storing, organizing, managing and sharing data and files. And now doing all of that is even easier thanks to the new Python SDK!
The TekDrive API allows you to perform multiple actions within TekDrive in any language. The Python SDK simplifies its usage even further — making uploading, moving, renaming and downloading files a piece of cake.
I am going to show you how painless analyzing oscilloscope files can really be with a use case: we’ve used TekDrive to hold our data files and now we will pull them locally to process in some other program and then share them with our colleagues.
Let’s get started!

Installation
Thanks to the SDK being published on the Python Package Index, installation is as easy as:
$ pip install tekdriveYou can view more details about the package here: https://pypi.org/project/tekdrive/

TekDrive Account Creation
To access your scope files from anywhere with an internet connection, you need to set up a TekDrive account. Registering for an account is easy — just follow the link and sign up: Register for TekDrive.
To manipulate files and folders with the SDK, you need an access key with the correct permissions. You can create an access key by clicking on your username in the top right corner and then selecting “Settings”. Under “Access Keys Management” click the “Generate an Access Key” button. You can choose to give your access key as much permission as you like. The minimum permissions for this specific example are create, update, and read.
Once you’ve generated your key, be sure to save it somewhere secure since you won’t be able to view it again.

The Use Case
Did you know that you can upload files directly from your scope to TekDrive? The process is easy — it allows you, or whoever is running your lab tests, to send the data files directly to the TekDrive platform. You can also upload files directly from your PC.
Now that you’ve got your files in TekDrive, you can use the SDK to interact with them! For this example, let’s say that you’ve put all the files you want to download and analyze into a specific folder, and you want to upload them post-analysis into a different folder.
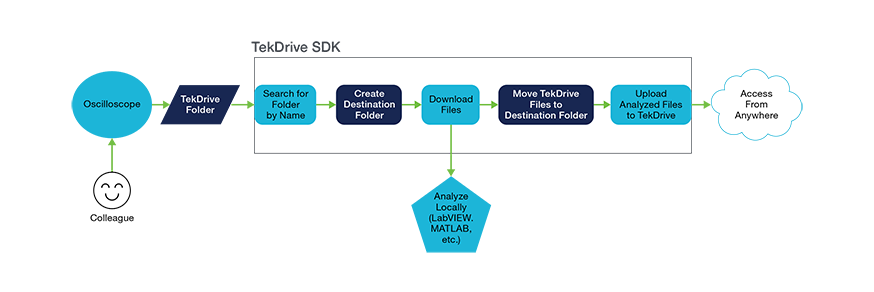
This script will go through the following steps to get your analyzed files uploaded to the cloud:
1. Search for the folder holding your raw files by name.
2. Create a new folder to hold your files after you’ve downloaded them.
3. Download each file in the folder locally.
4. Move each file into a new folder after downloading.
5. Once analyzed, upload transformed files to TekDrive.
The Code
This part will walk you through each piece of the code, but if you’d like to just copy the entire script and give it a try, go to the end of this article for the full code.
If you’d like to check out the SDK documentation for yourself, you can find it here.
The first thing we need to do is import our TekDrive SDK. datetime will let us timestamp our folder name and os is needed for downloading and uploading files.
Next, we need to add the access key you created inside of your TekDrive account. We also initialize the path for our downloads — it will be the same location as the script.
main() is where all the magic happens. We start by initializing the TekDrive module as td.
Now you can search for the name of the folder holding the files you want to analyze. In this example it’s named “to_be_analyzed”. You can then pull the folder id from your search results.
Next, you can create a folder instance using the id you just pulled called folder to analyze. You can also create a new folder and add the current date to its name so that we know what day the files were pulled for analysis. The folder name will look like analyzed-Jun142021.
Since you have the folder where our files to be analyzed are sitting, you can pull them one by one for download and then move them to your new folder. This way you won’t accidentally analyze any files twice.
You can create a file instance for each file in the folder and then download it. The downloaded file will have the same name as the TekDrive file (you can change it if you want to). Then you can move the file to the new folder you created earlier.
This is the part where you analyze your files with whatever you’d like: LabVIEW, Python, Excel, MATLAB, JMP. Just move the final file into a folder in the same directory as your script. In this example, I named the folder “analyzed files” and wanted them to keep the names I had given them.
First, you need to find the path to the folder holding our analyzed files. Next, you need to find the parent folder id of the folder you pulled the original files from in TekDrive. You could instead upload the files to another new folder using the same steps to create a folder that we did above.
Using the path we found, you then iterate over the folder’s contents and upload them back into TekDrive.
That’s it! That is how you can programmatically find files that need analysis, download them, analyze them, and then upload them into a platform that can be accessed from anywhere with an internet connection — even from your scope!
You can find the script in its entirety here.


